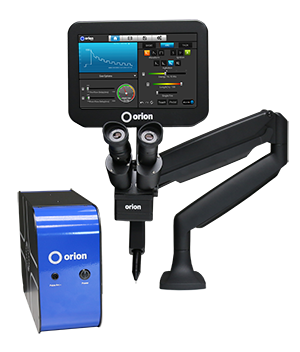
 The blunt contrast between the hi-tech digital interface and the fundamental pulse arc stylus is not lost on anyone who first bumps into the Orion 200i micro welder from Sunstone. The contrast is stark, but the relationship between the tech and the arc runs deep.
How so? Let’s start first with the digital interface, because what happens at the end of the electrode begins with the touchscreen. The technology is what differentiates the Orion 200i from any other pulse arc welder on the market—that and the available power (up to 200 Joules!). The purpose of the digital interface is to provide the operator (that’s you) absolute control over the weld. As an artist working with all types of metals, being able to adjust power and how the power is delivered allows you to work with any medium. For operators who are new to micro welding, the touchscreen interface can be set to display the ‘basic’ control tab, a screen that lets operators configure their weld parameters in three easy steps:
The display will update after each selection to illustrate how the selections affect the weld. The Orion 200i has been programmed with different presets based on 12 different metal types and five different applications, meaning there are more than 60 different combinations available to help anyone find appropriate settings and make successful welds. For operators who prefer to go a little deeper into the weld settings, the interface can be set to display the Arc control tab. In the Arc screen, operators have one-touch access to complete weld customization. With every project you can quickly adjust the waveform, weld energy, pulse time, agitation settings, ignition options, and more. So what does “going deeper” into the weld settings mean? The Orion 200i is unlike any other micro pulse arc welder in the amount of control and adjustments it offers the operator. For starters, the Orion 200i has a power range from 0.15 to 200 Joules, and the energy can be adjusted by as little as 0.05 Joule increments. Jewelers and artists who find themselves needing to weld 34 AWG (0.16mm) wires together on one day, and then needing to weld 1/8” (3mm) thick armature and sculpture wire the next day, can do so with the Orion 200i. What is also helpful, when making adjustments to the energy, is that the user interface will display an approximate spot size (or weld size). The estimated spot size takes some of the guess work out of determining how much energy to use for a particular job. The Orion 200i is capable of welding many different types of metals and can be used for a large variety of jewelry production and repair applications. The Orion 200i comes with presets for the following metals, but rest assured that this list is not all inclusive of what the Orion can weld: yellow gold, white gold, titanium, silver, palladium, tungsten, aluminum, brass, and many others. Operators can become proficient welding the following applications: prong re-tipping, ring resizing, closing jumprings, adding wires, filling porosity, eyeglass frame repair, chain repair, hollowear, springs and clasps, and temporary tacking prior to soldering. The Orion 200i can be used for a wide breadth of different applications. So much so that Sunstone’s YouTube channel contains a long playlist featuring application shots using only the 200i. In addition to the weld parameter controls, the Orion 200i has many other menus and tabs that empower the operator. The welder’s operation manual and how-to videos can be quickly accessed on screen. All the material is indexed and includes a search option for faster searching. The Orion 200i also includes dozens of application videos. When you select an application video suitable to your current needs, you have the option to load the weld settings used in the video. That one-click feature will save lots of setup time. How has the Orion200i been accepted by bench jewelers? “I use my pulse arc welder every day,” says Jeff Bramblet, owner of Ross’s Fine Jewelers. “The ability to weld small or large items is fantastic. Between my Orion pulse arc welder and laser welder there is nothing I can not handle at my bench.” The Orion 200i has a MSRP of USD $8,000 and can be shipped to nearly any location. Contact Sunstone Engineering at +1 801-658-0015 for more information (you can call or text to that number) or visit www.sunstonewelders.com.
0 Comments
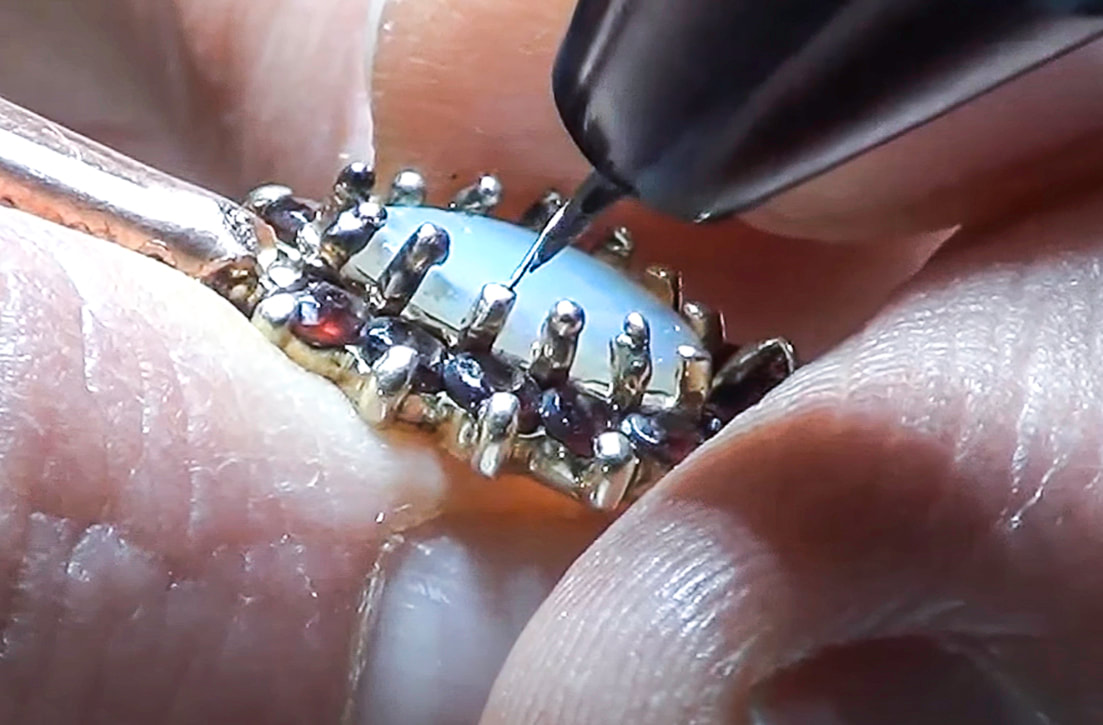 One of the most profitable uses for micro welding in jewelry is rebuilding or re-tipping a prong. Re-tipping saves a tremendous amount of time and effort. The stone doesn’t need to be removed from the piece, which is where you’ll save time. As a result, with re-tipping you can complete the repair in a matter of minutes rather than hours. To begin, you want to ensure that you protect the stone from sparks or the small amount of heat generated during the weld. Gem Guard is a useful product that creates a barrier to the stone. Once the stone is protected, use a 26 to 30 AWG wire of the same material as the piece you’re repairing. Straighten the wire to about a three-inch section so that it will stay extended. Now, turn your attention to the welder. The weld settings should be started low and you’ll gradually add more power to get the desired melt. Where you set your power at the beginning depends on the type of material you’re working with. For gold and silver, start at 6 to 8 Ws of energy with no agitation. Take time to clean and sharpen the electrode on the welder. A clean, sharp electrode will channel the energy more accurately and leave a better weld. Begin by holding the ring in your non-dominate hand with the prong to be welded pointing upward. The wire should be in your dominant hand with the straightened section pointing toward the prong to be welded. The wire should point directly out of the prong, as if the prong is being extended. With the wire touching the very end of the prong, touch the electrode to the prong, not the wire. The weld will initiate, melt the tip of the prong, and will pull the wire into the prong. A successful weld will result in the wire being melted into the tip of the prong. The next step is to get the wire free from the prong, leaving the melted section attached. This can be accomplished by using the welder. Place a weld about an eighth of an inch away from the prong on the wire itself. This will cut the wire and shape the prong. Further welds can be applied directly to the prong tip to give a nice rounded and shaped prong. A file or prong shaping tool can be used to get the desired prong shape. And, of course, you’ll want to buff and polish as needed. To learn more about how to re-tip a prong, you’ll find a number of fine tutorials on YouTube. A quick search will generate a sizable list of applicable videos. Sunstone recorded a live demonstration of re-tipping that you can watch here. Nathan Frey HEPA air purification systems are often misplaced in shops like yours. You, your team, and even equipment dealers are rarely educated on the nuances of where to place air filtration devices in the shop.
Why is indoor air quality important? According to the World Health Organization, four million people die each year from indoor air pollution. Research published in the journal, Science of the Total Environment, has shown indoor air to be two to five times more dangerous than outdoor air. Add an additional hazard, such as smoking or soldering, and those numbers jump to over 100 times more dangerous. Sure, no one is dropping dead or rushed to hospital after breathing bad air, but keep this in mind: related deaths and illnesses are typically from long-term exposure. Why HEPA is So Hip So, what’s the best and most cost effective way to improve air quality? Use HEPA air purifiers. Air quality and biological aerosol transmission are one of the biggest threats for workers in general. And, due to the recent pandemic, the CDC has weighed in on this topic. As recent as June 19th, the CDC emphasized that, “ventilation systems that provide air movement in a clean-to-less-clean flow direction reduce the distribution of contaminants and are better at protecting staff…” The recent pandemic has highlighted the need for air purifiers; however, units can be nearly ineffective if not properly placed. According to a paper published by the Ontario Health Technology Assessment Series, “The efficiency of any in-room air cleaner is its strategic placement and set-up within a room, which should be done in consultation with ventilation engineers, infection control experts, and/or industrial hygienists.” Where is optimal air purifier placement? A poorly positioned air cleaner may disrupt airflow patterns in the room, which compromises air cleaning efficiency. Simply put, a properly positioned system will capture dirty air, filter it, then expel the clean air. But, there are several key factors that affect how well this is done with any HEPA air filtration device. To correctly place an Air Purifier in a facility or lab, use the following steps:
Identifying Rooms Needing Filtration Ideally, each room should have proper air filtration. In cases where this is not possible, air purifiers should be prioritized in areas where aerosols and airborne transmission is highest, including break areas, lobbies, bench stations, or anywhere people congregate. Next, identify HVAC supply vents and return vents. This is important because supply and return vents can affect room air flow and the capabilities of the air purifier if turbulence occurs. Supply vents push the air into a room; you will typically find one in each room. Return vents pull the building air into the HVAC system through a filter and then redistributes the air using the supply vents. Placing an air purifier directly below a return vent will result in the filtered air going into the HVAC system. This can work well in small locations but is not ideal in larger facilities. Once you know where your return and supply vents are located, you can begin to understand the general air flow of the building. Identify air flow without turbulence, which allows for optimal filtration. Finding the Right Equipment Purchasing the wrong equipment without considering your air volume needs first can cause major issues. After all, the entire point of purchasing a HEPA air purifier system is to properly clean the air. You simply won’t be able to achieve this with improperly matched systems. Select an air purifier with enough CFM to achieve your desired ACH rate for the room it’s in. You’ll find a number of online calculators to help you with the math, or visit www.vaniman.com. After you determine what kind of device CFM is required, place the unit in a location where the direction of clean air flow isn’t affected by a supply vent. And make sure the system has plenty of access to the room air—avoid corners and tight areas if possible. When all these factors are taken into consideration, your air purifier system can effectively work to capture and filter adequate amounts of air for your specific needs. |