|
By Melissa Muir When making jewelry, I prefer to create pieces that are a bit different from traditional jewelry. I call my particular style “wearable art jewelry.” In the case of creating a pendant using two different types of metal, I want to illustrate not only traditional jewelry making techniques, but how I also mixed in pulse arc welding. My work tends to use a variety of metal, including gold, sterling silver, and even copper. Two of the most difficult metals to weld are silver and copper due to their conductive properties. The welding task becomes even more difficult should you wish to weld the two together due to copper and silver having conductive properties and melting temperatures that are worlds apart. Join me as I walk you through the entire process—from planning to finishing—of this swinging pendant made from copper silver. The design I chose makes traditional soldering methods difficult if not impossible. I am creating a hollow form with a design that encapsulates a large rose cut labradorite cabochon. If the stone is set, the top cannot be soldered into place. And if the top is soldered into place, the stone cannot be set. Typically, this piece would have me employ a cold connection mechanism. As you will see, a welder will solve this problem for me as well as simplify the job of attaching the swinging bail. A welder provides the perfect final touch: Two perfectly formed balls locking the bail into place. I start off by choosing the stone and a silhouette die that will give me the shape for the pendant. A silhouette die, as seen in Figure 1, features a shaped void in the center where metal can be pushed in to form a sort of pillow or embossed shape. Here I have chosen a stylized square and round rose-cut labradorite cabochon. Using the die as a guide, I draw up several different design ideas and settle on one for the final piece. The design is transferred to the metal using a pen and pencil, which will act as a guide for engraving and piercing but does not have to be exact (see Figure 2). 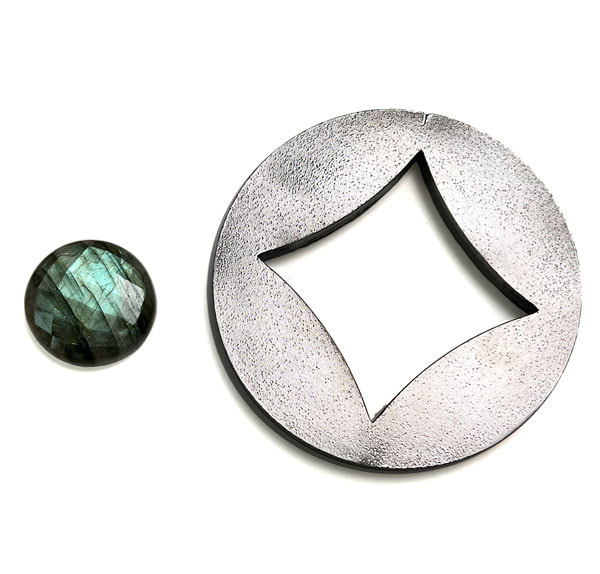 Figure 1. Silhouette die and labradorite cabochon. 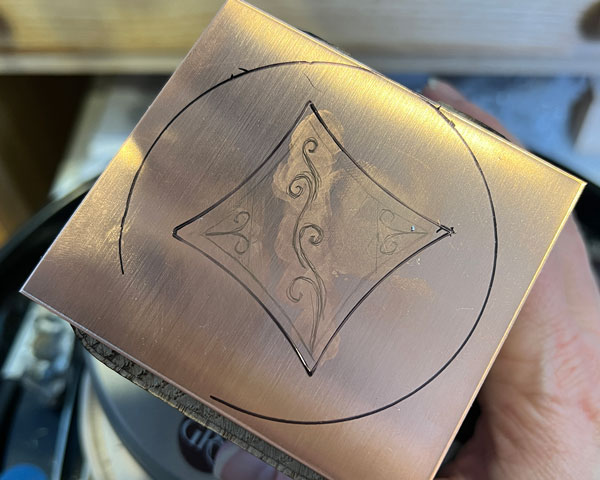 Figure 2. Design transferred to metal. In Figure 3, with the metal mounted and secured to a ball vise, you can see I use a graver to flare cut the design into the front of the piece. 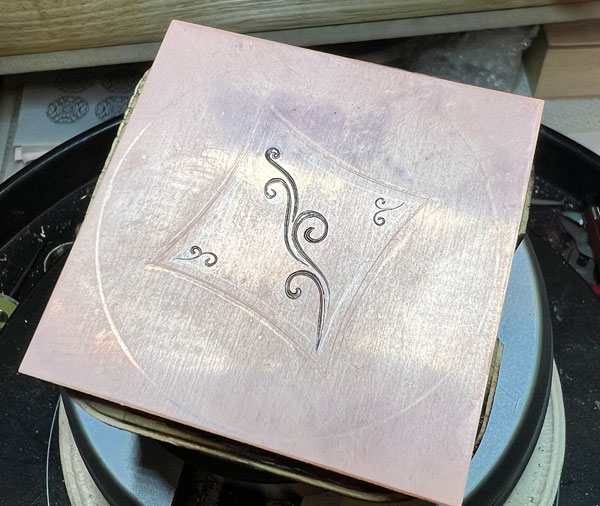 Figure 3. Using engraver to fare cut the design. Using the laser cut pattern from Rolling Mill Resources you see in Figure 4, the back piece is run through the rolling mill to provide the pendant with additional detail.  Figure 4. Adding detail using laser cut pattern from Rolling Mill Resources. The metal is taped into place on the silhouette die to keep the pattern in the desired position (see Figure 5). The die is then placed into a container along with a piece of urethane and steel pusher. The entire stack is then centered over the ram of a hydraulic jack in my press manufactured by Potter USA. I will repeat this process for both pieces applying about 2,000 pounds of pressure. 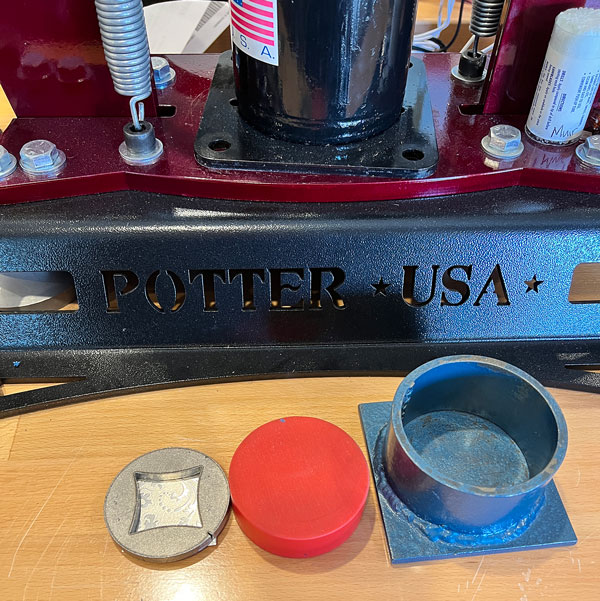 Figure 5. Using a Potter USA hydraulic jack to press pattern to the metal. Next, in Figure 6, using a jewelers saw, both pieces are cut out around the perimeter of the square shape. In addition, I cut the windows into the top piece using the engraved design as a guide. Due to the shape of the back plate, the bezel for the stone needs to be modified so it can be soldered into place securely. Sandpaper rolls come in very handy for this task as I can gently smooth away and form the bezel to fit properly (see Figure 7). The bezel is then soldered into place on the backplate. 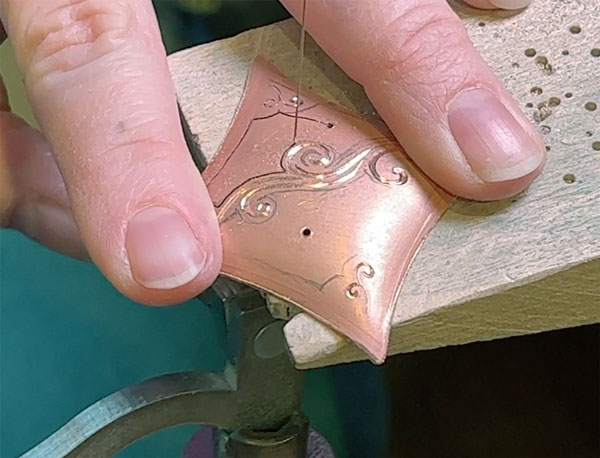 Figure 6. Use jewelers saw to cut out the background. 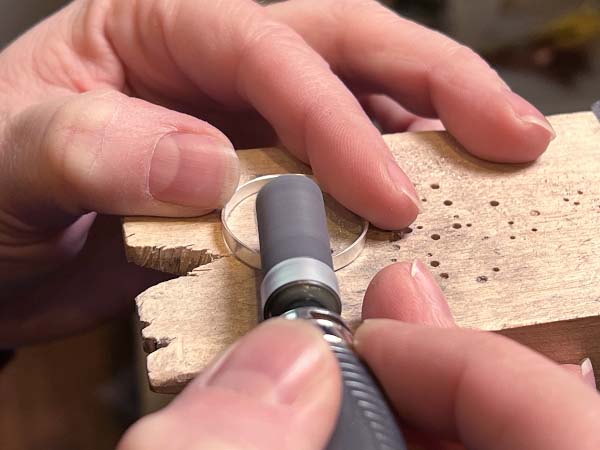 Figure 7. Smoothing the bezel for a correct fit. After a quick test fit of all the pieces (see Figure 8), I use a rubber abrasive to clean up any extra solder and polish the inside of both the top and bottom, which you can see in Figure 9. The design dictates that all this must be done before the two halves are welded together. 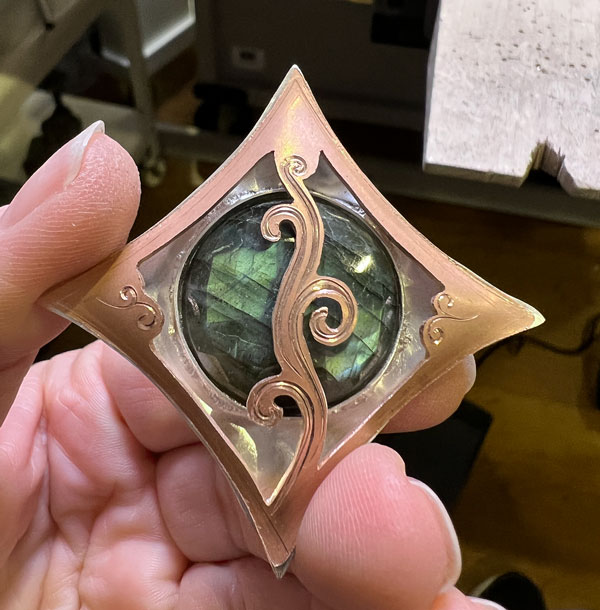 Figure 8. Checking for fit. 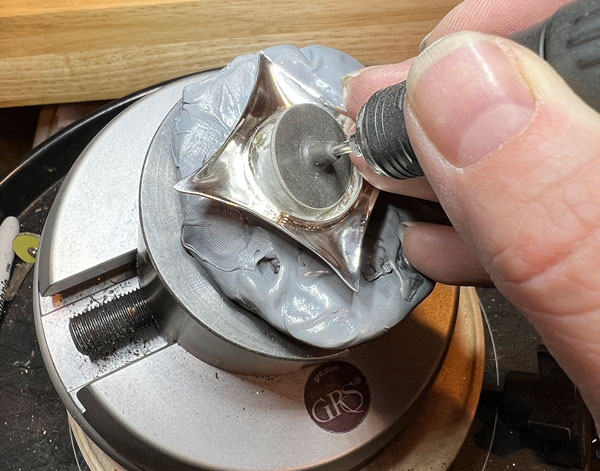 Figure 9. Cleaning up extra solder. To create a strong join, both pieces must have a good connection, similar to when soldering a bezel or ring. As you can see in Figure 10, I place a piece of 320 grit sand paper on a flat surface and rub both pieces to create a flat spot around the edges. 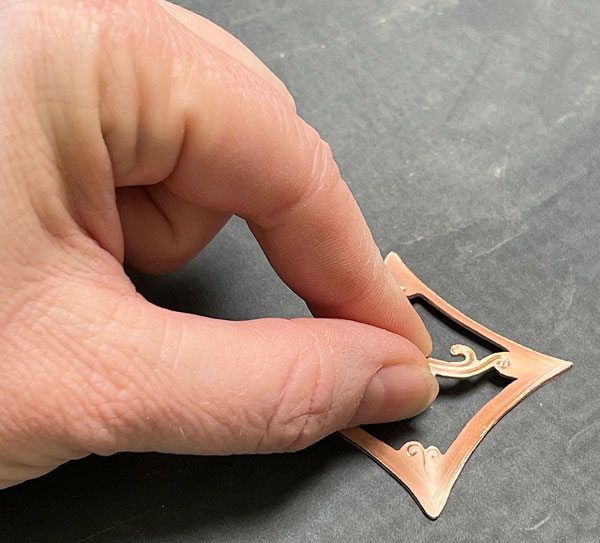 Figure 10. Creating a flat surface to create a stronger joining. Before I can weld the two pieces together, the stone must be set. I like to secure the piece in thermolock as seen in Figure 11, or some other fixturing compound to hold it steady. The stone can then be set with traditional bezel setting tools or a hammer handpiece. 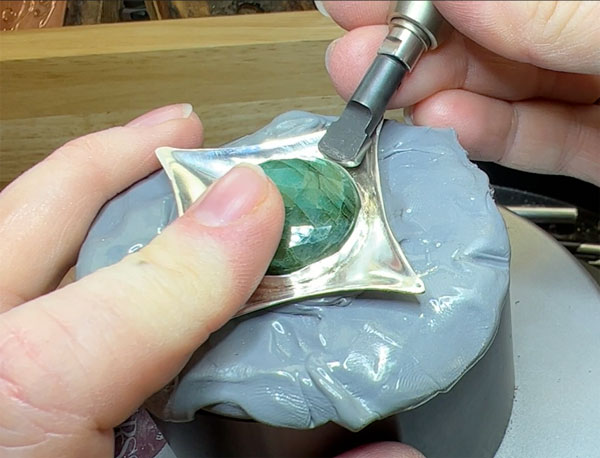 Figure 11. Setting the stone. Now, I’ll find the right weld settings for the materials I’m using. For this job I’m using the Orion 200i pulse arc welder from Sunstone, because the welder’s software walks me through the process of finding near-perfect settings. I start by selecting silver for the type of metal. Moving into the ARC screen I change a few settings:
Using scrap pieces which you see in Figure 12, I test the weld and make any necessary adjustments. (I like to use the cutoffs from the front and back to ensure that I am working with the same exact materials and thicknesses.) I want to see an even seam where there seems to be just one piece and not two. Once I am certain the settings are good for a proper join, I move to tack weld the center of each side on the pendant. 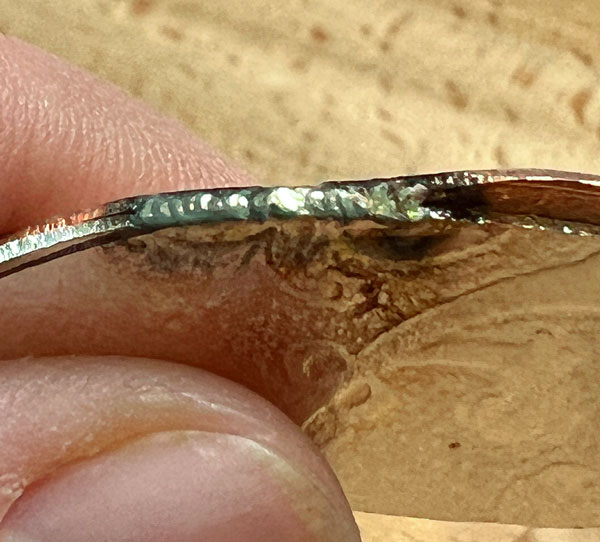 Figure 12. Testing different weld settings on scrap metal. Wearing leather gloves, I hold the piece and begin to weld one side of the pendant, making sure the electrode is touching both sides of the seam. As the piece warms up, I notice the seam becomes a little uneven and begins to have “splatters” and “drips” as you can see in Figure 13. The splattering and dripping are caused by two different factors. First, the electrode is beginning to become coated by the spattering of copper and silver, which affects the flow of energy through the electrode. Secondly, the piece is too warm for the amount of energy I’m using. 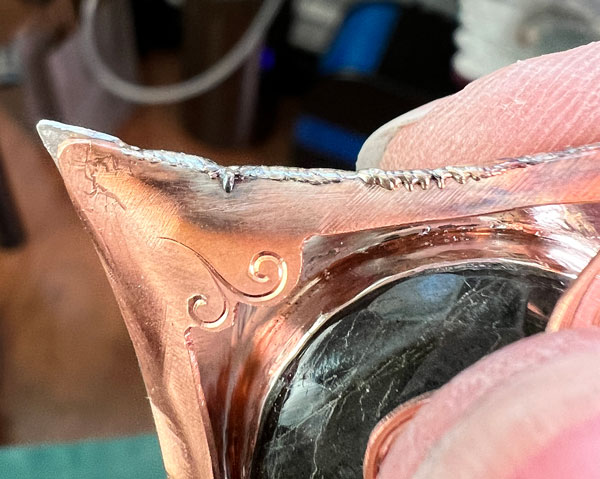 Figure 13. Weld splatters and drips. When welding copper and silver, I blunt the end of the electrode ever so slightly (see Figure 14), which helps the energy spread across the piece just a little. With a clean electrode and a change of energy down to 60 Ws, the seam is smooth, and, as you can see in Figure 15, I am left with a perfect weld bead on the edge of the piece. 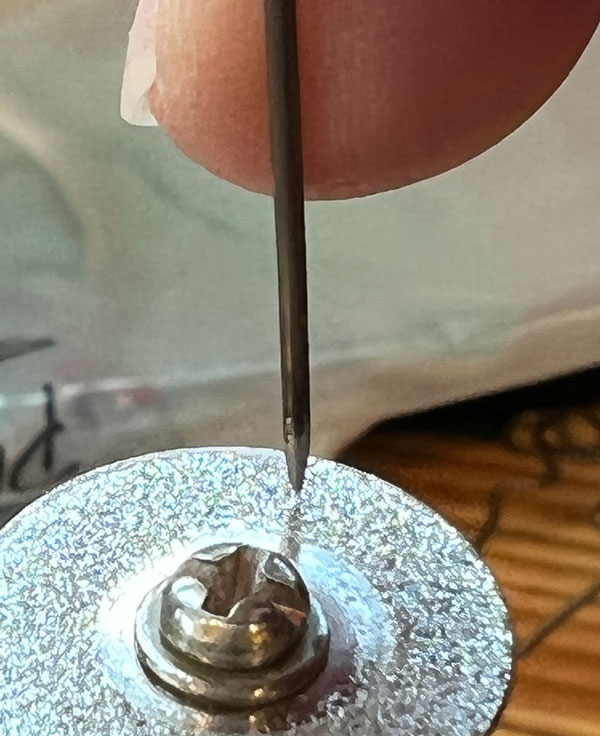 Figure 14. Blunting the electrode to spread energy across the workpiece. 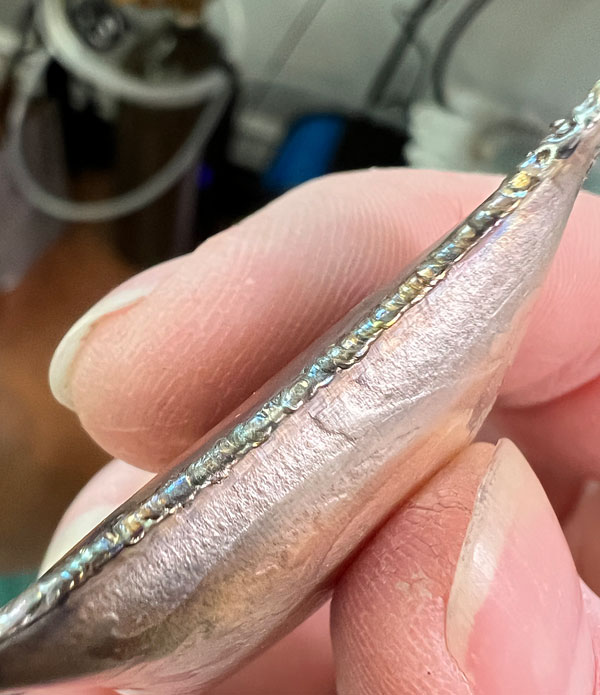 Figure 15. Better welding results with a blunted electrode. And now for the real test: Cleaning up the seam, which will clearly show if the weld is deep and solid. Because the form has an inward curve, I use a half round file to clear away as much of the metal as possible and even out the surface. (see Figure 16). If there are any pits, now is the time to fix them. If necessary, I use silver wire to add a little bit of metal to build up and smooth out the pits. Following the file, I use a sandpaper roll, then a silicone wheel, and finish with a soft cotton buff and polishing compound. 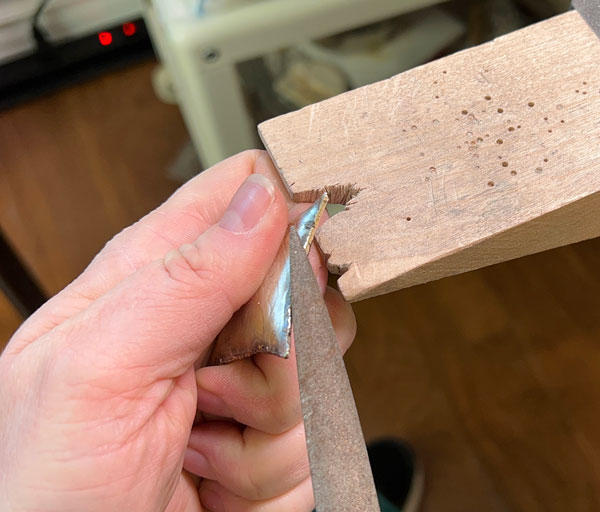 Figure 16. Cleaning up the seam. Finally, I need to make the bail. After deciding the shape, which you can see in Figure 17, I engrave a complimentary design and pierce it out with my jewelers saw. Before shaping, I measure and drill a hole at each end for the hinge pin. I use my ring bending tool from Durston Tools to bend it into a horseshoe shape. 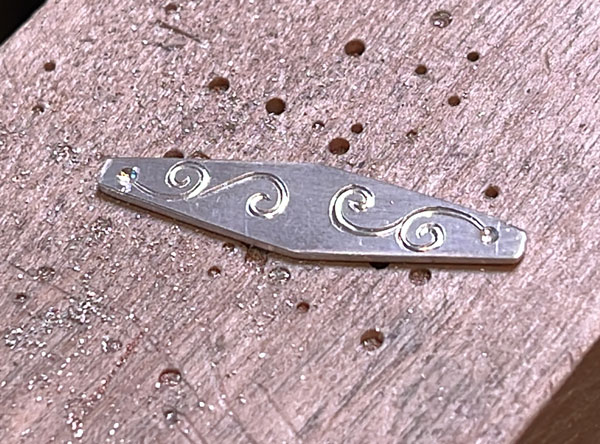 Figure 17. The bail laid flat. Using the hinge as a guide, I mark and drill a hole in the top of the pendant (see Figure 18). The wire I am using for the hinge pin is 0.8mm (20 gauge), so I use a 1.0mm drill bit for the holes. 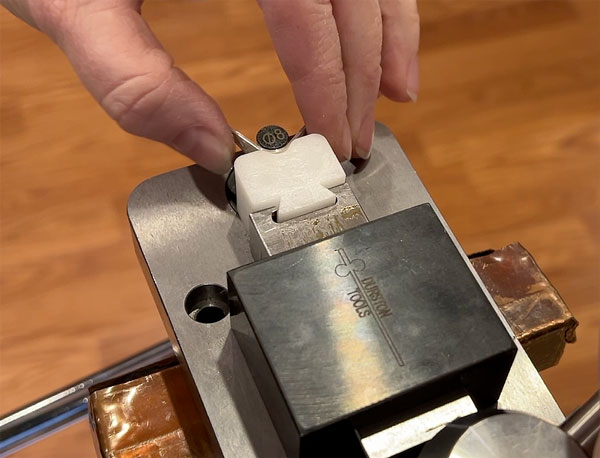 Figure 18. Bending the bail. Setting the welder to 6 Ws, I touch the end of the hinge pin wire to the tip of the electrode to form a small, perfectly round ball, which you can see in Figures 19, 20, and 21. I will typically repeat this at least once or twice to enlarge and straighten the ball if necessary. 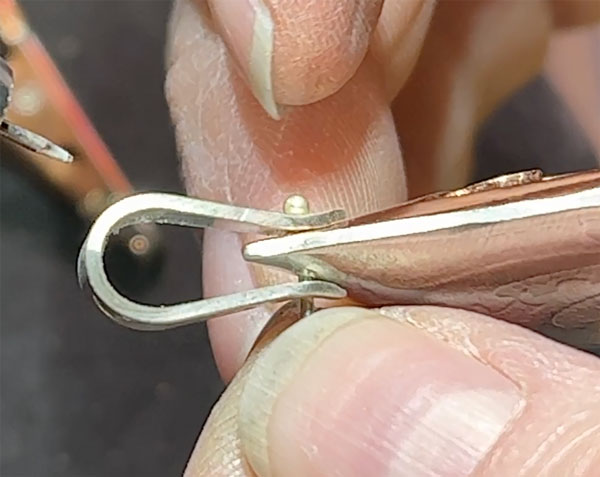 Figure 19. Balling up the end of the hinge pin. 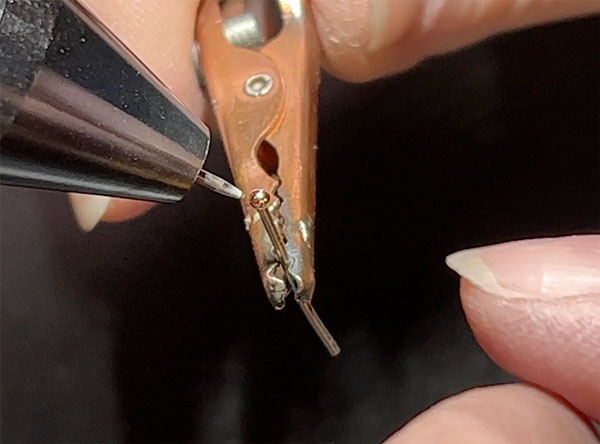 Figure 20. Using the pulse arc welder to ball up the hinge pin. 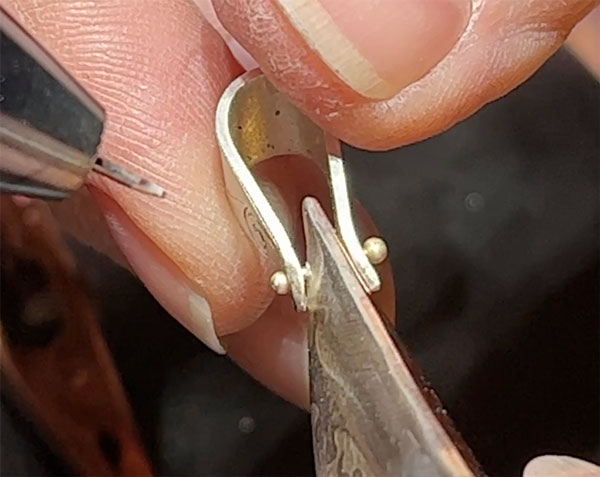 Figure 21. Closing the hinge pin with another ball using the welder. I will feed the pin through all holes capturing the pendant inside the bail. Once the wire has gone through all layers, I cut it to length, about 1/4” long, and repeat the balling process on the other end of the wire, effectively creating a hinged bail. As a final step, I remove any soot with the fiberglass brush and polish everything one last time with the soft cotton buff and polishing compound. The finished pendant speaks volumes about how much more creative I can be with a pulse arc welder. And not any welder; I’m familiar with the two major pulse arc welder brands. The Orion 200i provides the energy control I needed for a successful joining of silver and copper. When you take a close look at the edge of the pendant (see picture below), you can clearly see how the welder melded the two metals together, which I find impressive. 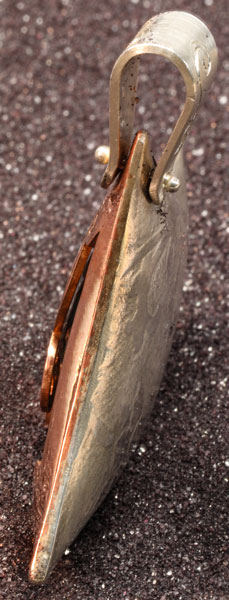 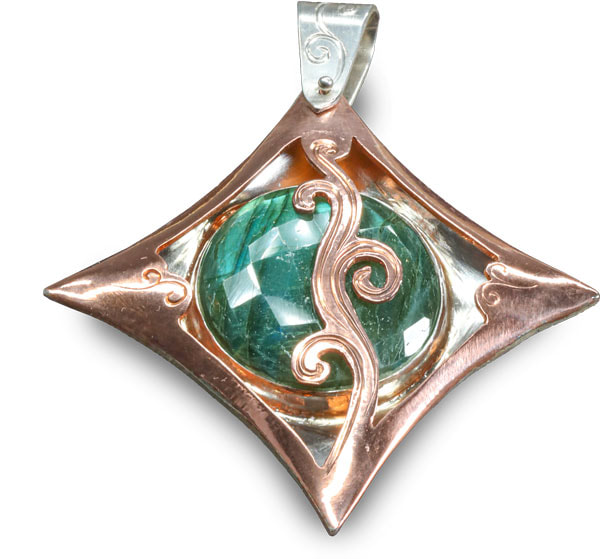 About Melissa Muir
For more than a decade, Melissa has used her skills as a talented educator to help thousands of people become more knowledgeable about tools, their uses, care, and maintenance. She works with some of the largest names in the industry as she shares her knowledge and love of various metalsmithing techniques and tools.
22 Comments
3/7/2023 03:46:27 am
the best part of the article is when it mentioned a few key details on how to weld and create jewelry. I have a friend who is into jewelry works and was asking me for more information about the topic. Thank you and I'll be sure to tell him about this very informative article because it provides you with key details on handling silver and copper as a metal for jewelry. 4/6/2023 08:59:26 am
"Your post on the basics of welding was a great refresher for me. Your explanations are so clear and concise." 4/6/2023 09:03:02 am
I really appreciate your emphasis on the importance of proper ventilation in the welding workplace. It's something that's often overlooked but can have serious consequences. 4/6/2023 09:05:03 am
As a welder myself, I found your tips for choosing the right welding helmet very helpful. Safety is so important in our line of work 4/17/2023 10:26:03 am
"Wow, what an amazing blog post! I loved how you presented your ideas clearly and concisely. Your writing style is engaging and kept me hooked from start to finish. 4/19/2023 08:44:38 am
Thanks for sharing. 4/20/2023 07:39:56 am
I always learn something new and interesting from your posts. Thank you for sharing your knowledge with us. 4/20/2023 07:42:26 am
Your post is so well-researched and informative. I can tell you put a lot of effort into it. 4/20/2023 07:44:04 am
Your positivity and enthusiasm are infectious! Reading your posts always puts me in a great mood. 4/20/2023 07:45:57 am
I love how you use real-life examples and anecdotes to illustrate your points. It makes your posts so relatable and engaging. 4/28/2023 12:29:25 am
Your write-up on the topic of silver and copper joining is excellent. Your detailed guide to metal preparation, solder selection, and safe welding practices is really appreciated. Your explanations of typical errors and their corrections were really helpful to me. If anyone is interested in learning more about working with metal or crafting jewelry, your post is a fantastic place to start. Your insight is much appreciated. 4/28/2023 07:58:34 am
"I loved reading this post! Your writing style is so engaging and made the topic really interesting to learn about." 4/28/2023 08:03:36 am
"This post provided so many practical tips that I can apply to my own life. Thank you for the actionable advice!" 4/28/2023 08:05:25 am
"Your post was exactly what I needed to read today. Thank you for the inspiration and motivation!" 4/28/2023 08:07:24 am
I appreciate how you broke down a complex topic into easily understandable pieces. This post was incredibly helpful! 4/28/2023 08:09:38 am
Your writing is so eloquent and beautiful. I could read your posts all day 5/10/2023 07:20:01 am
"I just wanted to let you know how much I appreciate the time and effort you put into creating this post. It's clear you're passionate about the topic and it shows." Leave a Reply. |